.png?fit=max&auto=format&n=z7mn2_Xnb9V482Ot&q=85&s=a7da8ae8f848315623c283d39843d7f2)
.png?fit=max&auto=format&n=z7mn2_Xnb9V482Ot&q=85&s=b93021eebe7a4c4147a406759ca21037)
Create a new table
1
Open the Data panel
Click the database icon in the top toolbar to open the Data panel.
2
Click New table
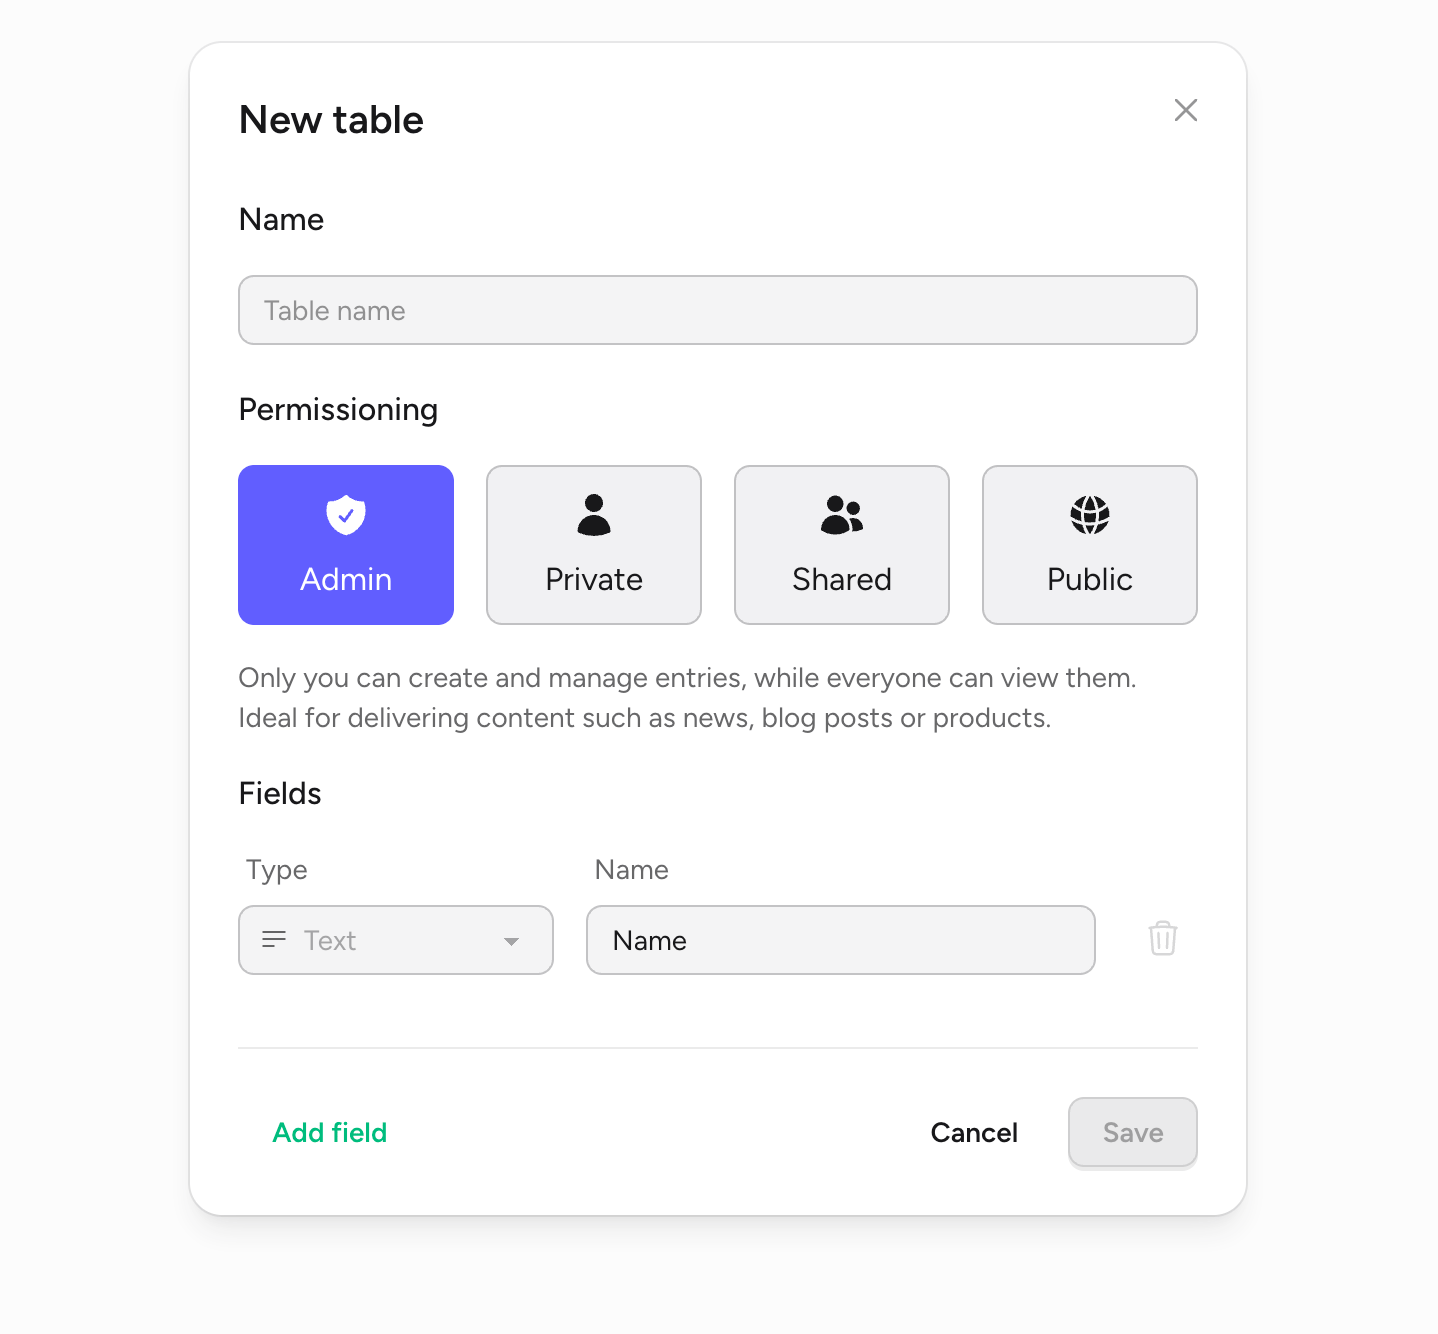
At the bottom of the panel, click + New table. The New table dialog opens.
3
Name your table
Enter a descriptive name (e.g.,
Tasks, Products, Posts).4
Choose a permission model
Pick one of the four permission modes (see Permissions below).
5
Add fields
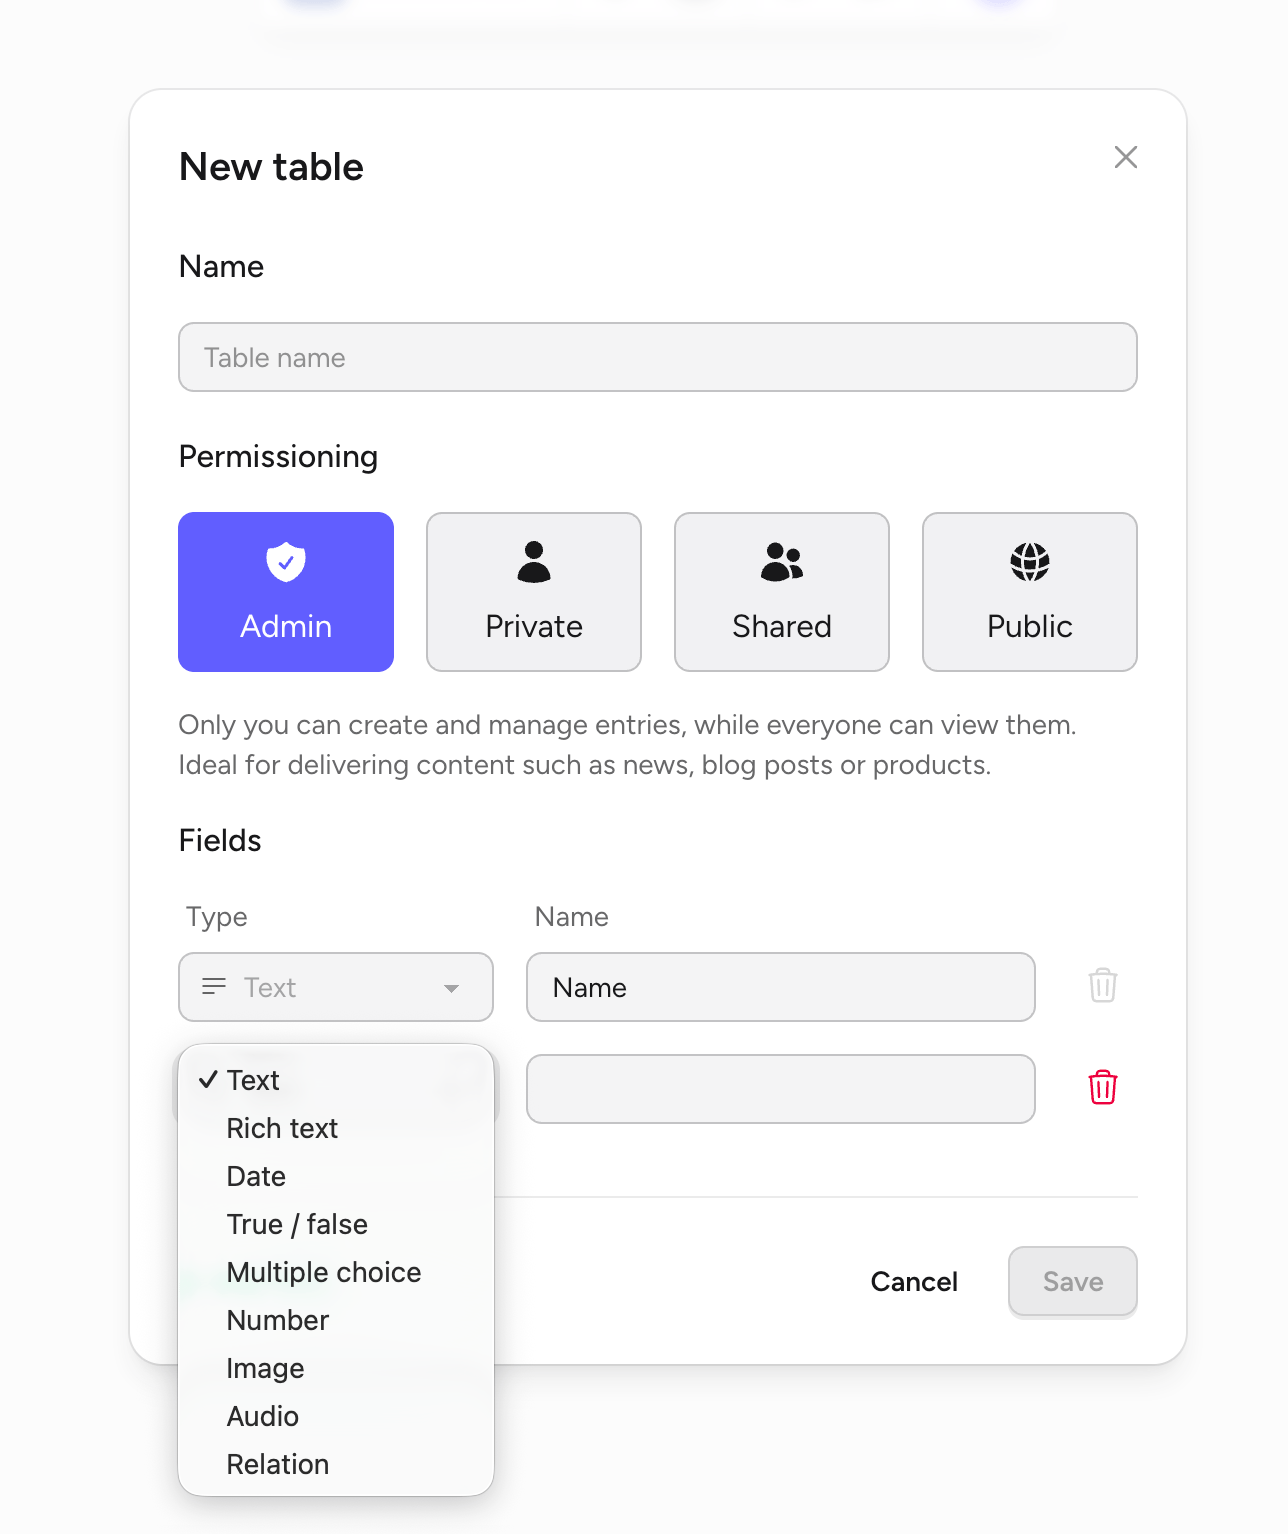
Every table starts with a Name text field. Click Add field to add more, choose a type, and give each one a name.
6
Save
Click Save. Your table is created and available to bind to components.
Permissions
Permissions control who can create, edit, and view entries at runtime in your live app. Pick the mode that matches how the data is meant to be used.Admin
Admin
Only you can create and manage entries, while everyone can view them.Ideal for delivering content such as news, blog posts, or products.
Private
Private
Users privately create, view, and manage their own entries.Works well for personal data such as tasks, personal notes, or habit trackers.
Public
Public
Everyone can create, edit, and view any entry.Use this for open collaboration, such as brainstorming boards or shared to-do lists.
Field types
When you add a field, pick the type that matches the shape of the data. The type controls the input Rey renders in the data grid and what you can bind to on the canvas.