> ## Documentation Index
> Fetch the complete documentation index at: https://docs.reyapp.io/llms.txt
> Use this file to discover all available pages before exploring further.
# Preview Your Rey App Before Publishing
> Test your Rey app in the browser, on a real iOS or Android device via the Rey app, or through TestFlight before shipping to the App Store or Google Play.
Rey gives you three ways to preview your app before it ever reaches the App Store or Google Play — each suited to a different stage of development:
An always-on browser preview inside the editor. Fastest feedback loop while you build.
Stream your in-progress app to a real iOS or Android device via the Rey app.
Distribute a production-signed build to internal or external testers before submitting to the App Store.
## Web preview
The **Preview** panel lives inside the Rey editor and shows an auto-refreshing, interactive copy of your app running in the browser. It's the fastest way to sanity-check a change without leaving the editor.
Open it by clicking the **play icon** in the top toolbar.
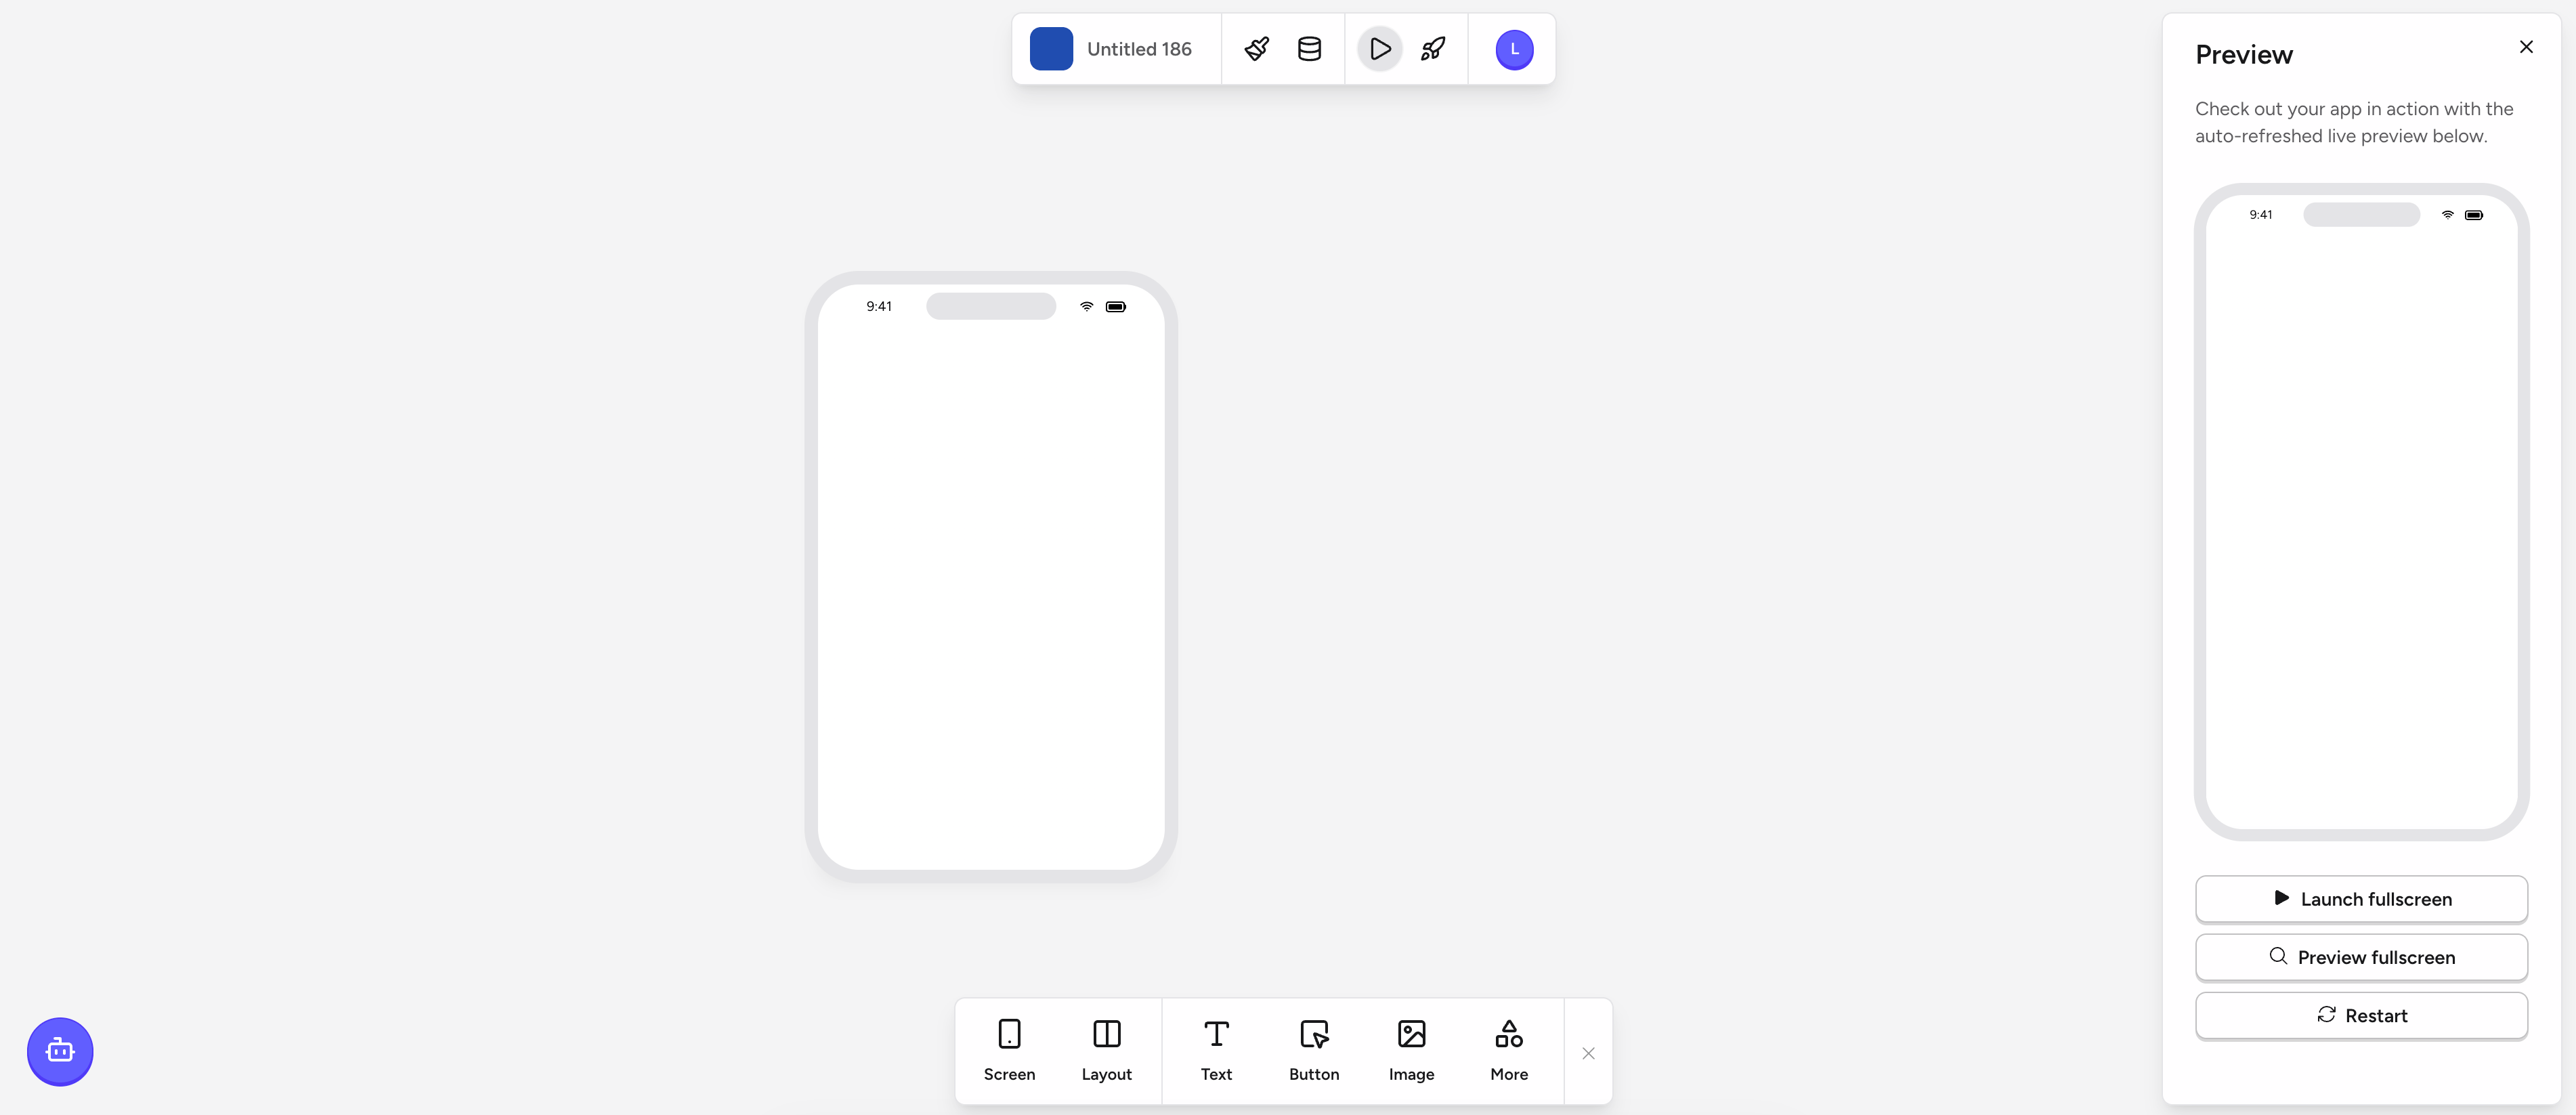 The panel offers three controls:
* **Launch fullscreen** — opens the app in a new tab as a full-window interactive preview. Best for click-through demos or sharing your screen.
* **Preview fullscreen** — expands the preview to fill the editor viewport without leaving Rey. Best for detailed layout work.
* **Restart** — reloads the preview from scratch. Use this after schema changes, action edits, or if the app enters a stuck state.
Web preview runs the app in **Edit mode** — reads and writes are sandboxed against your setup data and do not affect your live app or its users. See [Edit and Live mode](/publishing/edit-and-live-mode) for details.
## Device preview
Web preview is great for iteration, but nothing beats holding your app in your hand. **Device preview** streams your in-progress project to a real iPhone or Android phone via the **Rey app** — every change you save in the editor appears on the device instantly.
### Set up device preview
Install the Rey app on your iOS or Android device.
For iPhone and iPad running iOS
For Android phones and tablets
Sign in to Rey and open the project you want to preview.
Click the **play icon** in the top toolbar to launch the web preview and confirm device preview is enabled for your project. Keep the panel open while you work.
Open the Rey app on your device and sign in with the same account you use in the Rey editor. Your projects appear in a list.
Tap the project you're working on. Your app loads on the device — every edit you make in the editor appears on your phone instantly, no manual refresh needed.
### What device preview is good for
* **Navigation and transitions** — tap through every screen and flow exactly as a real user would
* **Interactions and gestures** — buttons, swipes, modals, and animations all behave as they will in production
* **Live data** — reads and writes against your connected data sources work in real time
* **True screen dimensions** — see exactly how your layouts fit on the physical device you're targeting
Device preview requires an active internet connection on both your computer and your phone, and you must be signed in to the Rey app with the same account as the editor.
## TestFlight
Once your app is close to shipping, **TestFlight** is Apple's official way to hand a real, production-signed build to testers before submitting to the App Store. Unlike device preview — which runs your in-progress project through the Rey app shell — a TestFlight build is the exact binary that will hit the App Store, installed as a standalone app on the tester's device.
Use TestFlight when you want to:
* Validate the final build with **internal testers** (up to 100 members of your Apple Developer team) before external release
* Invite **external testers** (up to 10,000) to try the app via a public or email invitation link
* Catch issues that only surface in a signed, sandboxed production build — In-App Purchase flows, push notifications, background modes, and permission prompts
### Publish a build to TestFlight
Rey publishes to TestFlight as part of the App Store deployment flow — the same build you promote to the App Store first lands in TestFlight for review by your testers.
Make sure you've registered a bundle ID, created an app in App Store Connect, and added your API credentials to Rey. See [Publish to App Store](/publishing/app-stores/app-store/overview) for the full checklist.
Open the **Publish** dialog (rocket icon), select **App Store**, and start a new build. Rey compiles, signs, and uploads the build to App Store Connect.
App Store Connect processes the build — typically 5–15 minutes. You'll see the build appear under **TestFlight** in App Store Connect once it's ready.
In App Store Connect, add internal testers directly, or create an external testing group and share the public link. External builds require a short Beta App Review from Apple (usually under 24 hours) the first time.
Testers download **TestFlight** from the App Store, redeem the invite, and install your app. Every new build you publish appears automatically in their TestFlight app.
Google Play offers an equivalent flow via **Internal testing**, **Closed testing**, and **Open testing** tracks. See [Publish to Play Store](/publishing/app-stores/play-store/overview).
## Which preview should I use?
| Stage | Use |
| --------------------------------------------- | ----------------------------------------------------------- |
| Iterating on a screen or logic change | **Web preview** |
| Checking layouts, gestures, and touch targets | **Device preview** |
| Handing a near-final build to real testers | **TestFlight** (iOS) or Play Store testing tracks (Android) |
Web and device preview both run in Edit mode against sandboxed data. Only TestFlight, App Store, Play Store, and Web-published builds hit your live data and real users.
The panel offers three controls:
* **Launch fullscreen** — opens the app in a new tab as a full-window interactive preview. Best for click-through demos or sharing your screen.
* **Preview fullscreen** — expands the preview to fill the editor viewport without leaving Rey. Best for detailed layout work.
* **Restart** — reloads the preview from scratch. Use this after schema changes, action edits, or if the app enters a stuck state.
Web preview runs the app in **Edit mode** — reads and writes are sandboxed against your setup data and do not affect your live app or its users. See [Edit and Live mode](/publishing/edit-and-live-mode) for details.
## Device preview
Web preview is great for iteration, but nothing beats holding your app in your hand. **Device preview** streams your in-progress project to a real iPhone or Android phone via the **Rey app** — every change you save in the editor appears on the device instantly.
### Set up device preview
Install the Rey app on your iOS or Android device.
For iPhone and iPad running iOS
For Android phones and tablets
Sign in to Rey and open the project you want to preview.
Click the **play icon** in the top toolbar to launch the web preview and confirm device preview is enabled for your project. Keep the panel open while you work.
Open the Rey app on your device and sign in with the same account you use in the Rey editor. Your projects appear in a list.
Tap the project you're working on. Your app loads on the device — every edit you make in the editor appears on your phone instantly, no manual refresh needed.
### What device preview is good for
* **Navigation and transitions** — tap through every screen and flow exactly as a real user would
* **Interactions and gestures** — buttons, swipes, modals, and animations all behave as they will in production
* **Live data** — reads and writes against your connected data sources work in real time
* **True screen dimensions** — see exactly how your layouts fit on the physical device you're targeting
Device preview requires an active internet connection on both your computer and your phone, and you must be signed in to the Rey app with the same account as the editor.
## TestFlight
Once your app is close to shipping, **TestFlight** is Apple's official way to hand a real, production-signed build to testers before submitting to the App Store. Unlike device preview — which runs your in-progress project through the Rey app shell — a TestFlight build is the exact binary that will hit the App Store, installed as a standalone app on the tester's device.
Use TestFlight when you want to:
* Validate the final build with **internal testers** (up to 100 members of your Apple Developer team) before external release
* Invite **external testers** (up to 10,000) to try the app via a public or email invitation link
* Catch issues that only surface in a signed, sandboxed production build — In-App Purchase flows, push notifications, background modes, and permission prompts
### Publish a build to TestFlight
Rey publishes to TestFlight as part of the App Store deployment flow — the same build you promote to the App Store first lands in TestFlight for review by your testers.
Make sure you've registered a bundle ID, created an app in App Store Connect, and added your API credentials to Rey. See [Publish to App Store](/publishing/app-stores/app-store/overview) for the full checklist.
Open the **Publish** dialog (rocket icon), select **App Store**, and start a new build. Rey compiles, signs, and uploads the build to App Store Connect.
App Store Connect processes the build — typically 5–15 minutes. You'll see the build appear under **TestFlight** in App Store Connect once it's ready.
In App Store Connect, add internal testers directly, or create an external testing group and share the public link. External builds require a short Beta App Review from Apple (usually under 24 hours) the first time.
Testers download **TestFlight** from the App Store, redeem the invite, and install your app. Every new build you publish appears automatically in their TestFlight app.
Google Play offers an equivalent flow via **Internal testing**, **Closed testing**, and **Open testing** tracks. See [Publish to Play Store](/publishing/app-stores/play-store/overview).
## Which preview should I use?
| Stage | Use |
| --------------------------------------------- | ----------------------------------------------------------- |
| Iterating on a screen or logic change | **Web preview** |
| Checking layouts, gestures, and touch targets | **Device preview** |
| Handing a near-final build to real testers | **TestFlight** (iOS) or Play Store testing tracks (Android) |
Web and device preview both run in Edit mode against sandboxed data. Only TestFlight, App Store, Play Store, and Web-published builds hit your live data and real users.